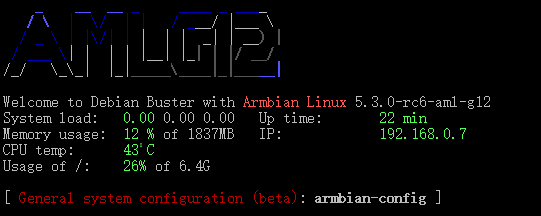
系统环境
版本: Armbian_5.91_Aml-g12_Debian_buster_default_5.2.0_20190715.img 下载 Armbian
DTB: meson-gxl-s905d-phicomm-n1.dtb 下载DTB phicomm-n1.zip
更换中科大软件源
编辑/etc/apt/sources.list,内容为:
deb http://mirrors.ustc.edu.cn/debian stretch main contrib non-free
deb http://mirrors.ustc.edu.cn/debian stretch-updates main contrib non-free
deb http://mirrors.ustc.edu.cn/debian stretch-backports main contrib non-free
deb http://mirrors.ustc.edu.cn/debian-security/ stretch/updates main contrib non-free或下载解压替换:sources.zip
更新软件包
apt update && apt upgrade -y
安装nginx、MariaDB、php7.3、redis
1、安装nginxapt install nginx -y
2、安装MariaDB(替代mysql)apt install mariadb-server -y
3、安装redisapt install redis -y
4、安装php7.3apt install php7.3 php7.3-cli php7.3-fpm php7.3-cgi php7.3-common php7.3-curl php7.3-gd php7.3-json php7.3-mbstring php7.3-xml php7.3-xmlrpc php7.3-xsl php7.3-zip php7.3-sqlite3 php7.3-mysql php7.3-opcache php7.3-bcmath php7.3-bz2 -y
【安装完成后,会自动在/etc/init.d添加开机启动】
配置Nginx
1、新建目录:mkdir /www/web/default -p,用来放默认网站
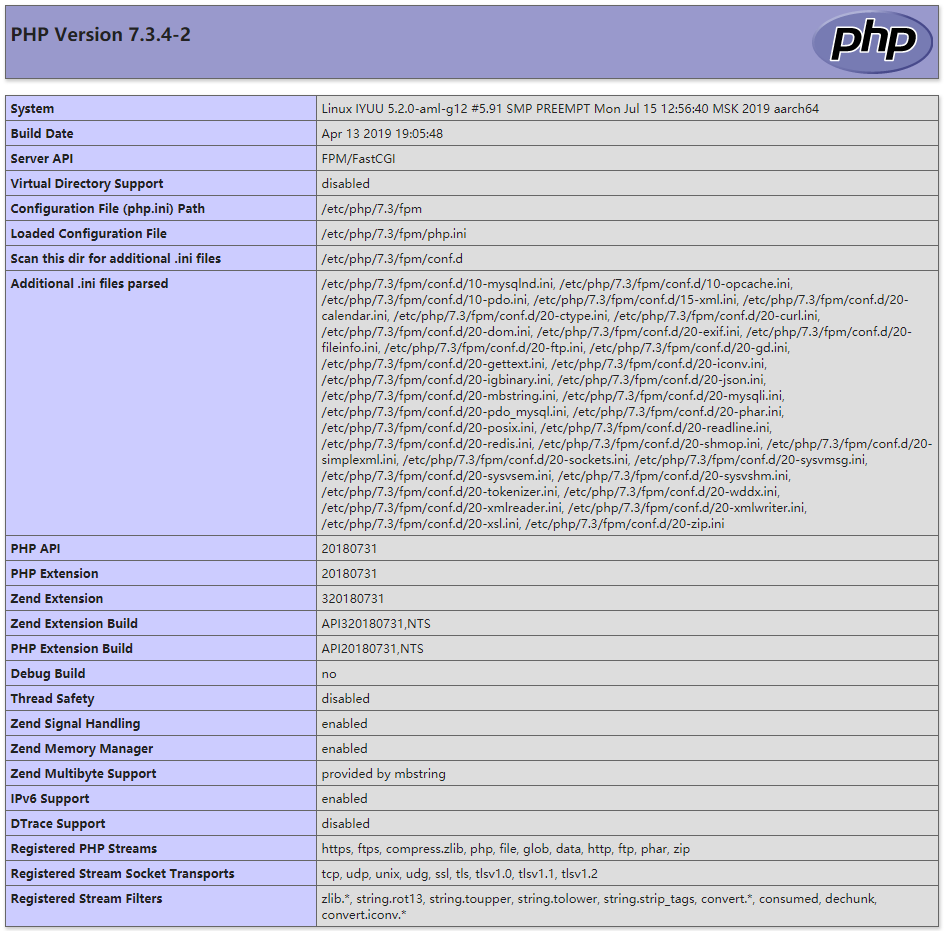
2、在目录/www/web/default下新建文件:index.php,内容:
<?php
phpinfo();
3、设置权限
设置拥有者、属组 chown -R www-data:www-data /www
设置权限 chmod -R 755 /www/web
4、编辑文件:/etc/nginx/sites-available/default,配置为:
server {
    listen 80 default_server;
    listen [::]:80 default_server;

    # SSL configuration
    #
    # listen 443 ssl default_server;
    # listen [::]:443 ssl default_server;

    root /www/web/default;

    # Add index.php to the list if you are using PHP
    index index.html index.php index.htm;

    server_name _;

    location / {
        try_files $uri $uri/ =404;
    }

    # pass PHP scripts to FastCGI server
    #
    location ~ \.php$ {
        include snippets/fastcgi-php.conf;

    #    # With php-fpm (or other unix sockets):
        fastcgi_pass unix:/run/php/php7.3-fpm.sock;
    #    # With php-cgi (or other tcp sockets):
    #    fastcgi_pass 127.0.0.1:9000;
    }

    # deny access to .htaccess files, if Apache's document root
    # concurs with nginx's one
    #
    location ~ /\.ht {
        deny all;
    }
}5、重启Nginx、重启phpservice nginx restartservice php7.3-fpm restart
6、访问测试页,IP以你的N1为准,我的是:http://192.168.3.7
服务的启动、停止、重启(start | stop | restart)
systemctl start nginxsystemctl start redissystemctl start mysqlsystemctl start php7.3-fpm
或者:service nginx startservice redis startservice mysql startservice php7.3-fpm start
查看各服务状态命令
service nginx status 或 systemctl status nginxservice mysql statusservice redis statusservice php7.3-fpm status
其他指令
- 查看php版本:
php -v - 查看php加载的模块:
php -m
mysql(mariadb)新建用户及用户授权管理
- 新建一个iyuu用户,密码123456
mysql
create user iyuu@localhost identified by '123456';
root@IYUU:~# mysql
Welcome to the MariaDB monitor.  Commands end with ; or \g.
Your MariaDB connection id is 47
Server version: 10.3.17-MariaDB-0+deb10u1 Debian 10

Copyright (c) 2000, 2018, Oracle, MariaDB Corporation Ab and others.

Type 'help;' or '\h' for help. Type '\c' to clear the current input statement.

MariaDB [(none)]> create user iyuu@localhost identified by '123456';
Query OK, 0 rows affected (0.002 sec)

MariaDB [(none)]> select user from mysql.user;
+------+
| user |
+------+
| iyuu |
| root |
+------+
2 rows in set (0.001 sec)
登录查看效果:
root@IYUU:~# mysql -u iyuu -p
Enter password:
Welcome to the MariaDB monitor.  Commands end with ; or \g.
Your MariaDB connection id is 51
Server version: 10.3.17-MariaDB-0+deb10u1 Debian 10

Copyright (c) 2000, 2018, Oracle, MariaDB Corporation Ab and others.

Type 'help;' or '\h' for help. Type '\c' to clear the current input statement.- 新建一个my用户并且授权全部操作权限:
grant all privileges on *.* to my@localhost identified by '123456';
MariaDB [(none)]> grant all privileges on *.* to my@localhost identified by '123456';
Query OK, 0 rows affected (0.001 sec)

MariaDB [(none)]> select user from mysql.user;
+------+
| user |
+------+
| iyuu |
| my   |
| root |
+------+
3 rows in set (0.001 sec)- 查看用户权限
show grants for my@localhost;
MariaDB [(none)]> show grants for my@localhost;
+--------------------------------------------------------------------------------------------------------------------+
| Grants for my@localhost                                                                                            |
+--------------------------------------------------------------------------------------------------------------------+
| GRANT ALL PRIVILEGES ON *.* TO 'my'@'localhost' IDENTIFIED BY PASSWORD '*6BB4837EB74329105EE4568DDA7DC67ED2CA2AD9' |
+--------------------------------------------------------------------------------------------------------------------+
1 row in set (0.001 sec)- 查看已有数据库
show databases; - 创建数据库
create database iyuu; - 设置iyuu用户拥有iyuu数据库,部分权限
grant select, insert, update, delete on iyuu.* to iyuu@'localhost'; - 设置iyuu用户拥有iyuu数据库,全部权限,
grant all privileges on iyuu.* to iyuu@localhost - 删除权限
revoke 权限 on 数据库.表 from '用户'@'IP地址'; - 删除用户
drop user '用户名'@'IP地址'; - 刷新权限
flush privileges; - 修改用户
rename user '用户名'@'IP地址' to '新用户名'@'IP地址'; - 修改密码
set password for '用户名'@'IP地址' = Password('新密码'); - 查看权限
show grants for '用户'@'IP地址'
全文完,现在可以愉快地玩耍啦!
数据库常用指令:
版权属于:大卫科技Blog
本文链接:https://www.iyuu.cn/archives/231/
转载时须注明出处


这么设置远程访问80端口
老哥,2g内存,装这些卡吗
还有安装包吗安装包高版本的dtp能用吗
不懂这样设置,没有图形界面的设置方法吗
网上一键包挺多的。